Image Compare Manual
Image Compare User Manual
Introduction to Image Compare: What’s it Good At
Image Compare is an image utility that you can use to inspect images, or compare images, in detail. Image comparison can be of images that you would like to evaluate the difference of, or can be of an image and edited versions of the same image. Image Compare provides a number of features that make inspection and comparison easy. Image Compare also supports a workflow in which you can iteratively edit an image and after saving it to file, compare with another image, for instance the original of the edited image. You cannot use Image Compare to edit images.
To Get Help
This user manual is accessible from Image Compare itself. Get the charms out (at the right of your screen) click Settings and then Help. Clicking the hyperlink named ‘Online Documentation’ will bring you to the help page at the Image Compare Support Site.
To Start Up Image Compare
In order to use Image Compare, you have to install it from the Windows Store. Once installed your Start screen contains a tile for Image Compare. Depending on the size of the tile, it looks either like this:
1. Large tile logo
or like this:
2. Small tile logo
If you click (mouse) or tap (touch) the tile, Image Compare will start up.
To Buy a License, or To Try it Out
If you haven’t bought a license for Image Compare, the program shows you a startup panel that gives you the options to buy a license directly from the program, to buy a license in the Windows Store, or to continue your 7-day trial period. After a trial period of 7 days, this last option is no longer available.
Once you have obtained a license, you will not see the startup panel again.
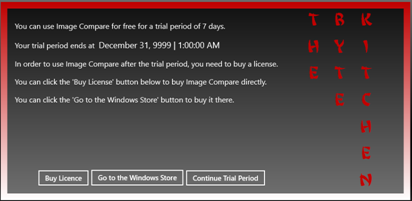
3. Example startup panel
View state
Windows 8 supports three view states: Landscape, Portrait, and Snapped views. In Portrait and Snapped view the images are arranged vertically, whereas they are arrange horizontally in Landscape view. In both Portrait view and Landscape view, all functionality is available to the user. In Snapped view the buttons for (de)selecting all images, loading images and monitoring folders (to be explained below) are not available. Alternating Snapped view and Landscape view is a fine way of working when you are editing images that you would like to inspect in more detail with Image Compare.
A quick way to change view state if you are using a keyboard is to type ÿ+. (or SHIFT +ÿ+. to work backwards).
To Load Images
Image Compare has a startup text that reads ‘Raise the lower App Bar to load one or more images’. The lower App Bar is raised by a right click of the mouse or an upward swipe from the bottom bezel. At the right the lower App Bar contains a button subscripted ‘Images’. You can tab (touch) or click it to navigate to the file selection screen. You can load images from any location you can navigate to from the initial file selection screen; you are not restricted to images from your pictures library.
Image Compare loads and shows all Windows 8 supported image file formats (jpg, png, bmp, gif, tiff, jpg xr, ico), as well as the binary .PPM (P6 Portable PixMap) format.
During the loading of files, Image Compare shows an animated progress ring, indicating it is working. As long as the animation represents motion, everything is fine and you can just wait for the images to appear.
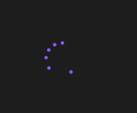
4. Progress ring
Status Border
Each image is surrounded by a border. Under normal circumstances this border is dark grey. However, in case there has been a status change, this change is indicated by showing a bright color for five seconds. If an image has been loaded successfully, it will show a green status border. After five seconds the green will fade back to dark grey.
In Case of an Error
Image Compare will load at most fifty images. If you select more images in the file selection screen, Image Compare shows an error messages indicating that the loading of all files has been cancelled. This complete cancellation allows you to make a new selection of at most 50 images.
Sometimes image files cannot be read by Image Compare, or the collection of images you want to load is too large to fit available memory. In such cases Image Compare will show an error message indicating load failure, and he cause of the failure. If multiple images failed to load, the error message shows two small buttons that allow you to browse the individual error messages. Browsing the error messages informs you of the names of the files that could not be loaded as well as of the nature of the load failure.
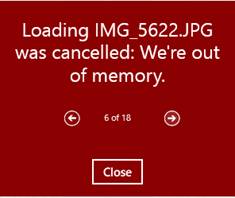
5. Error popup showing multiple, browsable errors
To Navigate
When more images are loaded than can be shown on the screen, you can browse the image collection.
Touch
With a swipe gesture (touch).
Mouse
Right below the images will be a horizontal scrollbar. You can drag its thumb with your mouse, or if the mouse pointer is positioned over the scrollbar, you can move the thumb by rotating the mouse wheel.
Keyboard
You can also use the keyboard. Press TAB once, then use the Left Arrow and Right Arrow keys to browse the images.
Zoom
You can zoom in to images up to a factor of 10,000, or zoom out up to a factor of 0.1.
Touch
Zooming by touch requires you to make the expand / pinch gesture.
Mouse
Zooming by mouse works by positioning the mouse pointer over the image you’d like to change the zoom factor of, press CTRL and rotate the mouse wheel.
Double tapping / clicking an image returns it to its load time zoom factor.
Pan
Once the image is larger than the viewport – the screen area dedicated to a specific image – you can pan the image, so as to position it at other locations ‘under’ the viewport.
Touch
Panning by touch requires the drag gesture.
Keyboard
Panning by mouse requires you to manipulate the horizontal and / or vertical scrollbar of the viewport.
Double tapping / clicking an image returns it to its load time position in the viewport.
The Pan and Zoom PopUp
If you zoom or pan, a small orange PopUp overlay windows will appear that shows you the current zoom factor and position. You can alter the zoom factor and position using the keyboard. You can also drag the PopUp onto another image and drop it there. Dropping the PopUp onto another image has the effect that this other image will take on the specified position and zoom factor.
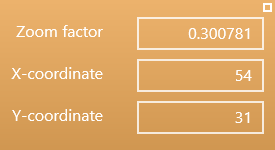
6. Zoom and position popup
Thus, the PopUp helps in manually specifying zoom factor and position of an image, and in copying zoom factor and position from one image to another.
To close the PopUp you can click / tap anywhere at your screen, press enter while the PopUp shows a blinking cursor, drop it somewhere, or click the little square at the top right corner.
To Resize
Each image has a fixed size minimal border. You can see the size of the border when you zoom in with a factor that enlarges an image beyond the boundaries of the viewport. You can also see the size of this border when the status changes, then this border will be brightly colored. You can use this border to resize the images. A resize action can only be applied to all images. The maximum size is limited by the size of your screen.
Touch
If you place your finger on the border in touch, a thin white line appears at the outer boundary of the image. This is a resize ghost, it shows the outline of the new image size if you at that point release the mouse button or remove your finger from the screen. You can resize the ghost by moving your finger until it has the size you like. When you remove your finger from the touch screen, all images resize to the indicated size. Moreover, since the relative distance between the images remains the same, more images become visible (at size reduction), or less images become visible (at size increase).
Mouse
Click the border with the mouse, and keep the left mouse button pressed. Drag the resize ghost (see ‘touch’ above). Release the mouse button, to have all images take on the indicated size.
To Rearrange
The images can be rearranged; their relative order can be changed. In Landscape view the rearrangement is horizontally, in Snapped view or Portrait view, it is vertically.
Rearranging works differently for touch interaction and for the mouse. This is due to the different approaches to zooming and panning for mouse and touch in Windows 8.
Touch
To rearrange by touch place your finger at the left upper corner of the border of the image you would like to move, and drag the image to its desired location.
Mouse
To rearrange with the mouse, place the mouse over the image itself, not over the image’s border, and drag the image to desired location.
To Select Images
You need to select an image if you want to flip it or engage it in subtraction operations. A selected image shows a purple-like rim and a check mark in the upper right corner of its border. You can select all images or clear the current selection from the lower App Bar.
Touch
You can (de)select an individual image by tapping it with your finger.
Mouse
You can (de)select an individual image by clicking it with the mouse.
Keyboard
Type CTRL+a to select all images, type CTRL+SHIFT+a to clear the selection.
Horizontal Flip, Vertical Flip
If you want to compare two images, you might want to flip one of them, so as to bring interesting parts closer together, or bring them in positions that allow easier comparison. Image Compare allows you to both horizontally and vertically flip selected images.
The Flip operation is available from the lower App Bar.
Subtraction
Subtraction is a means to establish that an image is (un)equal to another image or a collection of other images.
In order to determine whether image A is different from image B, you can (pixel-wise) subtract B from A in Image Compare. If the images are equal, the minuend (image A, in this case) becomes black; if you subtract one pixel value form another, equal pixel value, the result is zero, which translates to a black pixel. In order to determine whether an image is equal to the (pixel-wise) sum of a number of other images, you can subtract multiple images (subtrahends) from a single minuend. If the result (difference) is zero, the minuend is equal to the sum of the subtrahends.
Subtraction is a more informative type of comparison than just a notice that two images are (un)equal. After subtraction of two unequal images it is also visible where the images differ.
In order to subtract images in Image Compare, select the images to be subtracted. The first image selected will become the minuend. After selection, press / tap the Subtract button in the lower App Bar. The result of subtraction will be visible in the image selected to be the minuend.
Subtraction is additive and reversible. Meaning that if you have constructed an initial subtraction, and deselected the involved images:
- You can add a new image to the subtraction by selecting it and pressing / tapping ‘Subtract’.
- You can remove an image from the subtraction by selecting an already involved subtrahend, and pressing / tapping ‘Subtract’.
- You can reverse the complete subtraction by selecting the minuend and pressing / tapping ‘Subtract’.
- You can combine the above by selecting the minuend and a few new images. The existing subtraction will be inverted; a new one will be created for the newly selected images. The same holds for selecting existing subtrahends and selecting uninvolved images: the subtrahends will be removed from the subtraction, the new ones will be added to the subtraction, that is, they will be subtracted from the minuend.
Status Border
After subtraction the status border of an image will be colored to reflect the outcome, as follows:
- The minuend will be colored purple.
- A subtrahend that equals the minuend will also be colored purple.
- Any other subtrahend will be colored pink.
- A candidate subtrahend that does not have the same number of pixels as the minuend is colored red.
- After ‘unsubtraction’ the status border of an image will be colored to reflect the outcome, as follows:
- The minuend will be colored yellow.
- A subtrahend will be colored orange.
To Monitor Folders, Reloading images
The right most button on the lower App Bar allows you to select folders (one folder each time you click the button), that Image Compare will monitor for changes. Monitoring means that if an image in a folder that is selected for monitoring changes, Image Compare will automatically reload that image. This holds for all images in all monitored folders.
Reloading an image conserves its state at the time of loading. That is: relative order, zoom, position in the view state, flip, and status in subtraction will all remain the same. If an image is involved in subtraction, then the subtraction status will have to be rebuilt. This is a computational intensive process. You can actually see reloaded minuends change from clean picture into minuend.
Status Border
If a picture is reloaded, it will be colored blue. Note that folder monitoring is not the only cause for reloading images, see the subject ‘PC Sleep and Hibernation’ below.
Workflow that includes an Image Editor
The functionality described above allows you to set up a workflow that includes an image editor of your choice. You could load an image and a backup copy of that image. You can then use rearrangement, zoom, pan and flip to set up the images for comfortable comparison, add subtraction if so required. You can then select the folder containing the image to be edited for monitoring.
When you have edited the image, and saved the changes, Image Compare will automatically load the changed image. If you hold Image Compare in Snapped view while working in you editor in Landscape view, you’ll have an excellent view on image reload notification, hence images being ready for further scrutiny.
Suspension PC Sleep and Hibernation States
If Image Compare is suspended, if your pc is sent to sleep, or into hibernation, Image Compare clears out the images from memory. It reloads the images, and restores state after waking up. The reloading of images is again signaled by a blue colored status bar.
Note that Windows 8 may terminate suspended apps if it deems necessary. Image Compare does not preserve state through app termination.
Contact Information
In case you have comments or questions, please let us know by filling out the comment form below. Please do not forget to leave an e-mail address where we can send a response, if so desired.
