Archive for the ‘Silverlight’ Category

PInvoking DirectX from Silverlight

Before moving on to Windows 8 development, I decided to write some legacy software. Well actually, this legacy software is perfectly up-to-date Windows 7 level software; tricks presented here will be useful for years to come. It’s just that Windows 8 (Consumer Preview) provides standard solutions to the problems solved here. This blog post discusses the use of a DirectX application, packaged as a DLL, by a Silverlight application, via PInvoke.

The problems tackled here stem from the desire to have Rich Internet Applications (RIAs) for Windows, that use computational resources on the client computer. In particular DirectX for 3D-graphics, X3dAudio, for 3D-audio, and also the GPU (Graphics Processing Unit – a powerful, highly parallel processor). Silverlight provides the facilities to write RIAs, but has a somewhat outdated 3D-graphics library: a subset of XNA – a managed wrapper for DirectX9 (but we want DirectX11, at least!). This Silverlight 3D-graphics library is not very extensive, it lacks e.g. 3D-audio.

On the other hand, Silverlight does provide facilities for interoperability with native code, e.g. by means of PInvoke: the invocation of native code in Dynamic Link Libraries (DLLs). PInvoke is here the bridge between Silverlight and DirectX code.

This blog post presents:

  • A sample DirectX11 application, and its transformation into a DLL to be used from Silverlight.
  • A Silverlight application that calls methods in the dll.
  • How to install and uninstall the DLL, and how to manage its lifetime explicitly, so the DLL may be uninstalled by the Silverlight application itself.
  • Performance aspects of the Silverlight-DirectX application, and a comparison with a Silverlight application that uses the Silverlight 3D-graphics library for the same task.
  • Concluding remarks, for one thing that this application should have had 3D-audio to decisively mark the advantage of the approach presented here (but at some point, you just have to round up).

The DirectX 11 Sample Application

The DirectX 11 Tutorial05 sample application will serve as the application a user wants to run on his or hers PC, and that uses resources already present on that PC. This DirectX application is the most simple application that contains some animation, and it has also a part – the small cube – that we can multiply in order to generate data for various performance loads.

To that end we transform it into a DLL with as much unnecessary functionality stripped, and an adequate interface added, including the code to transfer the data we need in the Silverlight application. Let’s take a look at the main changes.

Minimizing Window Management Code

For starters, We do not need a window, we use the DirectX application only to compute the 3D-graphics we present in the Silverlight application. The wWinMain (application entry point) function now looks like this:

Sample code like above is entered into the text as pictures. If you would like to have the code, just leave a comment on this blog with an e-mail address and I will ship it to you.

The function has no “Windows” parameters any more, nor has it a main message loop. The InitWindow function has been reduced to:

We do need to create a window in order to create a swap chain, and only for that reason, so we keep it as simple and small as possible. Note that the wcex.lpfnWndProc is assigned the DefWindowProc. That is: the application has no WindowProc of its own.

Create Texture to be Used in Export

In order to export the 3D-graphics data, an additional texture (a texture is a pixel array) called g_pOutputImage is created in the InitDevice function:

This texture has usage “Staging”, so the CPU can access it, and we specified CPU access as “Read”. With these settings we can’t bind the texture to the DeviceContext anymore, so no BindFlags. Note that we cannot have a texture that the GPU writes to, and the CPU reads from. If that would have been possible we could have had a data structure that both DirectX and Silverlight could have used directly. Since this is impossible we will have to perform expensive copy operations. Alas.

A final change in this same function is that we do not release the pointer to the back buffer, but keep it alive in order to export the graphics data in the Render function.

Rendering 3D-Graphics

The Render function has a loop added so we can have multiple small cubes. The idea is to compute a World matrix for each additional small cube. That is, we have only one cube, but draw it multiple times at different locations. Like this:

and:

Converting and Exporting 3D-Graphics Data

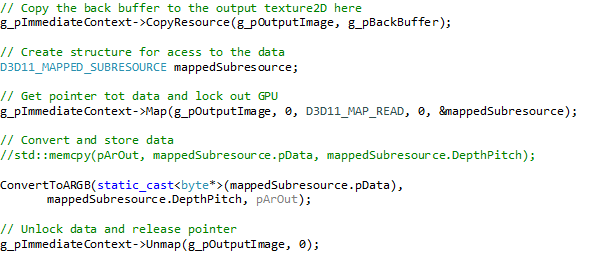
Finally, we want to copy the 3D-graphics data into an array the Silverlight client has provided, so that the client can show it to the user. This is done like so:

The above is standard code, I obtained it around here (the direct link seems broken). The ConvertToARGB function, however is a custom addition, replacing the memcpy call (more about that in the section on performance). This ConvertToARGB converts the RGBA format of DirectX to the premultiplied (PM) ARGB format used in Silverlight. This PM ARGB format is considered legacy now. The conversion step is a real performance hit as anyone can imagine. The function looks like this:

Essentially this OR-s 4 integers, the first one is constructed by byte-shifting the A (transparency) byte all to the left, then 3 integers are created by pushing the RGB bytes in place. This is a fast algorithm since shifting is a quick operation. I found it here. After the conversion, the pixels are in the correct format in an array that is owned by the Silverlight client application.

The DLL Interface

The interface has the following methods:

And for performance measurements:

The above functions return an average time over the Render function, and an average time over the conversion and export respectively. Details will be discussed below. The

decoration results in a clean export of the function names. Without the decoration, the C++ compiler will add a number of tokens (among which at least a few like @#$%^&*) to the function name in order to make it unique. The problem with this is that you’ll have a hard time retrieving the actual function name for use in the Silverlight client.

The Silverlight Client

General Architecture

The application has the following structure:

The App class is the application entry point (as usual). The Application_Startup event handler, depicted below,

first checks if the application is running out-of-browser (OOB). Running OOB is the intended normal use of this application. If so, a MainPage control is instantiated which will run the DirectX code. If the application is running in-browser, it still needs to be installed. Only after installation, the application has access to the file system – required to save and load the dll – and to the GPU. The application requires Windows 7 or higher and bails out if a lower level Windows or Apple OS is found.

The install page offers to install the application on the user’s PC, as depicted below,

or tells the user that the application is already installed, and hints at ways to uninstall the application if so desired.

If the user installs the application, it starts running out of browser and shows the MainPage with the DirectX animation.

Installing, Uninstalling, and Managing DLL Lifetimes

Installing includes saving the DirectX application in the DLL to a file on the user’s PC. The DLL is packaged with the Silverlight application as a resource. For execution, the DLL has to be loaded in memory, or be present on the PC as a file. Saving the DLL to file is done with code after an example from the NESL application. We store the application at “<SystemDrive>ProgramDataRealManMonths PInvokeDirectXTutorial05”.

Once the DLL is saved to file we load it into memory using the LoadLibrary function from the kernel32.dll. The reason we manage the dll’s lifetime explicitly instead of implicitly by importing the dll, and calling its functions, is that we need to be able to explicitly remove the dll from memory when exiting the application, see below. Loading into memory requires a dll import declaration:

And a call of this function, in the MainPage_Loaded event handler:

Where DllPath is just the path specified above. Is that all? Yes, that’s all.

When the application is exited, we use the handleToDll to release the library with repeated calls to FreeLibrary. Declaration:

Then we call it in the Application_Exit event handler as follows:

The point is that each method we import from the dll increases the reference count. As long as the reference count is larger than zero we cannot unload the DLL, nor delete its file. Not being able to delete the file means we cannot properly uninstall the application – we would leave a mess. Once the ref count is zero, FreeLibrary unloads the library from memory.

The final question in this section is why we delete the dll file every time we exit the application, and create the file every time we start it up. The reason is that if we do not do that, and the user uninstalls the application from the InstallPage (running in-browser), the application does not have the permissions to access the file system, hence the DLL file will not be deleted. So, all these file manipulations are bound to the runtime of the application in order to have a clean install and uninstall experience for the user.

PInvoking the DirectX Functions

Now that the application can be installed, functions from the DirectX application interface can be declared and executed.

[DllImport(DLL_NAME, SetLastError = true, CallingConvention = CallingConvention.Cdecl)]

public extern static int Init(int width, int height,

[MarshalAs(UnmanagedType.LPWStr)] String effectFilePath);

[DllImport(DLL_NAME, SetLastError = true, CallingConvention = CallingConvention.Cdecl)]

public extern static void Render([In, Out] int[] array);

[DllImport(DLL_NAME, SetLastError = true,CallingConvention = CallingConvention.Cdecl)]

public extern static int Cleanup();

[DllImport(DLL_NAME, SetLastError = true, CallingConvention = CallingConvention.Cdecl)]

public extern static void GetRenderTimerAv(ref double pArOut);

[DllImport(DLL_NAME, SetLastError = true, CallingConvention = CallingConvention.Cdecl)]

public extern static void GetTransferTimerAv(ref double pArOut);

We make a call to the Init function in the MainPage_Loaded event handler, calls to the dll Render function, in the local Render method, and a call to CleanUp in the Application_Exit event handler.

Calls to the timer functions are made when the user clicks the “Get Timing Av” button on the MainPage.

Debugging PInvoke DLLs

At times you may want to trace the flow of control from the Silverlight client application into the native code of the DLL. This, however is not possible in Silverlight. Silverlight projects have no option to enable debugging native code. Manually editing the project file doesn’t help at this point. Now what?

A work around is to create a Windows Presentation Foundation (WPF) client. I did this for the current application. This WPF application does not show the graphics data the DirectX library returns, it just gets an array of integers.

To trace the flow of control into the DLL you need to uncheck ”Enable Just My Code (Managed only)” at (in the menu bar) Tools | Options| Debugging, and to check (in the project properties) “Enable native code debugging” at Properties | Debug | Enable Debuggers.

If you now set a breakpoint in the native code and start debugging from the WPF application, program execution stops at your breakpoint.

Reactive Extensions

In order to have a stable program execution, the calls to the dll’s Render method are made on a worker thread. We use two WriteableBitmaps, one is returned to the UI thread upon entering the Silverlight method that calls the dll’s Render method, the other WriteableBitmap is then rendered to by the DLL. After rendering, the worker thread pauses to fill up a time slot of 16.67ms (60 fps).

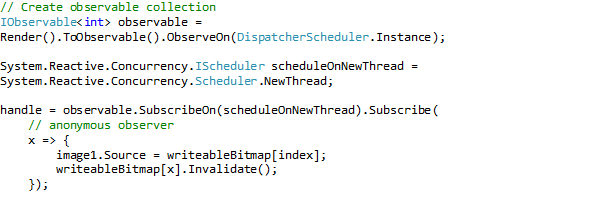
Thread management and processing the indices that point into the WriteableBitmap array (implementation detail J ) is done using Reactive Extensions (RX). The idea is that the stream of indices the method returns is interpreted by RX as an Observable collection and ‘observed’ such that it takes the last index upon arrival, and uses the index to render the corresponding WriteableBitmap to screen. This results in elegant and clean code, as presented below.

The first statement create an observable collection from a method that returns an IEnumerable. Note that ‘observing’ is on the UI thread (referred to by the ‘DispatcherScheduler’)

The SubscribeOn(ScheduleNewThread)-clause creates a new thread for the render process. The lambda expression defines the action if a new int (index) is observed.

Rendering on the worker thread proceeds as follows:

To stop rendering we just put IsRunning to “false”. And that’s it.

Performance

DirectX applications – by definition – have higher performance than .Net applications. However, if you pull out the data from a DirectX application and send it elsewhere, there is a performance penalty. You will be doing something like this:

CPU -> GPU -> CPU -> GPU -> Screen instead of CPU -> GPU -> Screen

The extra actions: copying data from the GPU to CPU accessible memory and converting to Premultiplied ARGB will take time. So the questions are:

  1. How much time is involved in these actions?
  2. Will the extra required time pose a problem?
  3. How does performance compare to the Silverlight 3D-graphics library?
  4. Are there space (footprint) consequences as well?

Before we dive into answering the questions, note that:

– The use of DirectX will be primarily motivated by the need to use features that are not present in the Silverlight 3D-Graphics / -Audio library at all. In such cases comparative performance is not at all relevant. Performance is relevant if the use of DirectX becomes prohibitively slow.

For the measurements I let the system run without fixed frequency; usually you would let the system run at a frequency of 60Hz, since this is fast enough to make animations fluent. At top speed, the frequency is typically around 110Hz. I found no significant performance differences between debug builds and release builds.

Visual Studio 11CP Performance analysis: Sampling

If we run a sampling performance analysis – this involves the CPU only, the bottleneck in the process becomes clear immediately: The conversion from RGBA to premultiplied ARGB (and I’m not even pre-multiplying) takes 96.5% of CPU time.

It is, of course, disturbing that the bulk of the time is spent in some stupid conversion. On the other hand, work done by the GPU is not considered here.

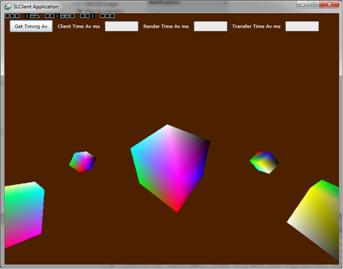
To investigate the contribution of the conversion further, I replaced the conversion by a memcpy call. Then we get a different color palette J, like this:

But look, the frequency jumps up to 185 fps (80% more). The analysis then yields:

That is: much improved results, but shoving data around is still the main time consumer. Note that the change of color palette by the crude reinterpretation of the pixel array is a problem we could solve at compile time, by pro-actively re-coloring the assets.

Compare to a Silverlight 5 3D-library application

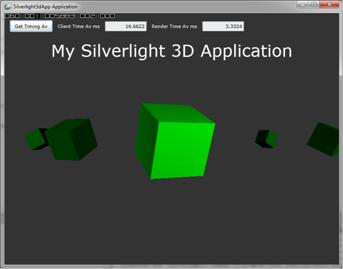
Would the performance of our application hold up to the performance of a Silverlight application using the regular 3D-graphics library? To find out I transformed the standard Silverlight 3D-graphics starter application to a functional equivalent of our Silverlight-DirectX application, as depicted below – one large cube and 5 small cubes orbiting around it (yes, one small cube is hidden behind the large one).

If we click the “Get Timing Av button”, we typically get a “Client Time Average” (average time per Draw event handler call) of 16.6.. ms, corresponding to the 60 fps. The time it takes to actually render the scene averages to 3.3 ms. This latter time is 0.8ms without conversion, and 2.8ms with conversion for the Silverlight – DirectX application (if we let it run at max frequency). So, the Silverlight-DirectX alternative can be regarded as quicker.

If we look at the footprint, we see that the Silverlight-DirectX application uses 1,880K of video memory, and has an image of 50,048K in the Task Manager. The regular Silverlight application uses 5,883K of video memory, and has a 37,708K image. Both in SLlauncher. So, the regular Silverlight application is smaller.

Concluding Remarks

For one, it is feasible to use DirectX from Silverlight. PInvoke is a useful way to bridge the gap. This opens up the road to use of more, if not all, parts of the DirectX libraries. In the example studied here, the Silverlight-DirectX application is faster, but has a larger footprint.

We can provide the user with a clean install and uninstall experience that covers handling and lifetime management of the native dll.

Threading can be well covered with Reactive extensions.

There is a demo application here. This application requires the installation of the DirectX 11 and the Visual C++ 2010SP1 runtime packages (links are provided at the demo application site). I’ve kept these prerequisites separate, instead of integrating their deployment in the demo application installation the NESL way, mainly because the DirectX runtime package has no uninstaller.

If you would like to have the source code for the example program, just create a comment on this blog to request for the source code, I’ll send it to you if you provide an e-mail address.

Silverlight and COM

Silverlight supports interoperability with COM, and that is a good thing. It does not support registration-free COM, and that seems to me a missed opportunity. This lack of support for registration-free COM has, however, no impact on the importance of COM.

COM

Many books have been written about COM, and none of them can give a short definition of COM that is also comprehensible to people that not already know what COM is. So, here we go, and take the same route J: COM is a software development discipline to develop reusable components. This reusability is at the binary (not human readable) level. There is a standard way of interacting with COM components. Interaction with COM components is programming language and location independent. COM components may (depending on how they are built) support parallelism.

Relevance

The relevance of COM is enormous. Microsoft has written a great deal of its software (Windows) as COM components. For instance, DirectX consists of a number of COM components. Windows 8 is also being built upon COM. The Windows 8 WinRT layer is an intermediate layer of components that are built on COM (are COM components). Each WinRT component implements the IInspectable interface, which inherits from IUnknown. However, working with WinRT is unlike working with classical COM. See this article for more. The message is that COM, in some form or another will be with us for quite some time to come. Yes we are talking about the Windows platform here. The market share of Windows among computers (including phones and tablets) that access the internet is at time of writing about 84%. Some see this go down, I think it will go up with the introduction of Windows 8 and its emphasis on tablets and phones, and its uniform user experience over a large range of devices.

The good thing for us is that it is far easier to use COM Components than it is to write COM components. Using WinRT components is even easier. On the other hand, let’s not dramatize writing COM. COM programming concerns only a very thin layer in you code; the interface with the outside world.

Writing COM

COM hinges on a few principles that are not very hard to understand. A good book on COM is Don Box’s. Programming COM is quite a bit tougher. To my opinion this has to do with the large amount of macros (#define, #ifdef), typedef-s and odd naming conventions. I understand the typedef-s and macros’ are there to make things simpler. Point is that there are so many simplifications that they pose a problem; why can’t I just use the C++ I already know?

ATL

But then, if you really want to write COM, you will use ATL (Active Template Library). This makes writing COM much easier (‘easier’ as in “I don’t know what I’m doing”) writing ATL is a science in itself. I find it very hard to recognize the COM in ATL. An online introduction on ATL is here. The latest version number of ATL is unknown (to me). Visual Studio 2005 carried ATL 8.0. I’ve found no version numbers specific to VS2008 or VS2010.

Attributed ATL

There is a special flavor of ATL called “Attributed ATL” or ATL and Attributes. The attributes were added to make programming ATL simpler. And I think it does. However, the general public doesn’t seem to have adopted this style of programming due to diminished control over the ATL / COM code – the attribute would typically lead to source code insertion. See also the introduction into ATL referred to above. For an introductory article into Attributes ATL see here. In community forums the dominant emotion is that Attributed ATL is deprecated.

Registration-Free COM

Registration-free COM objects are a special case of Isolated Applications and Side-by-Side Assemblies, which is deployment and servicing technology for both native and .Net applications. Introductions into Registration-Free COM are here, and here. Isolated applications and Side-by-Side assemblies depend on the use of manifests. An assembly is an abstract entity defined by the manifest. Then, of course people choke on manifest creation. A handy tool is Regsvr42.

How does registration-free COM activation work? When a client application loads a dll holding a COM component, the loader checks if the application has a manifest before it checks the registry. If there is an application manifest, the loader searches for (a) library manifest(s). If found the COM component gets loaded and executed. This approach makes registration of COM components unnecessary. Requirements for registration-free COM to work are that the client is an application (something that has a process) and that this application has either an embedded or an external manifest associated with it. An embedded manifest cannot be overridden by an external manifest (except on Windows XP).

Silverlight

Silverlight supports COM interoperability. Wouldn’t it be nice then, if we could also ship COM components with the Silverlight Xap over the internet for execution elsewhere. COM components that we made ourselves, for instance. Of course, executing a COM component that is received over the web needs some user initiated installation in order to maintain the necessary protection against evils from internet. So, we do not expect to be able to execute our COM component within the context of our Silverlight application’s resources.

The current mission is to use the DirectX runtimes that are installed on every Windows 7+ systems from a Silverlight application. In this we can take the NESL approach: to install native software, like COM components, if the user installs the Silverlight application (installation of the Silverlight application is, for all practical purposes, required for use of the GPU). The installed application being the custom DirectX application to be used for ultimate 3D graphics and media effects in Silverlight. We could improve the user experience by skipping the installation of COM components, by using registration-free COM. Silverlight would then not require a search in the registry for a ProgId, the loader could read the manifest and simply load the required dll-s.

However, registration-free COM activation doesn’t work for OOB Silverlight Applications. These applications run in the process of the sllauncher.exe, which has an embedded manifest, as inspection with a simple text editor reveals. So, that ends the story of registration-free COM and Silverlight.

What can we do have?

We can have Silverlight applications, for instance Out-of-Browser applications, that consume COM components. If we bring our own component, we have to install it, registration-free activation will not work. Installation can be done the NESL way.

In some community forums thread someone wrote that only interoperability with out-of-process COM servers is possible. This is not correct. The consumed COM component should have a ProgId in the registry. It is not a requirement that is also is an application (has its own process). I’ve tested this statement with a simple in-process COM server that returns a string appended to its input string parameter: “Marc” -> “Hello Marc”. A 100.000 calls take about 760ms on my machine. By contrast, an out-of-Process server that does the same takes about 19 seconds. Both debug builds, by the way.

Since the Windows 8 Windows Runtime is built on COM, investment in COM expertise also seems to be future proof.

PInvoke with Silverlight

As indicated in the previous blog post: PInvoke is the next best thing if you want to use native C++ code from Silverlight. And the first next thing that works.

What is PInvoke

PInvoke, or Platform Invoke is about the invocation from .Net code of dynamic link libraries (dll-s), often written in C++, and frequently part of existing systems like the Windows OS. The idea is that the library in the dll, exports a number of symbols representing methods (including properties) and hooks for callback functions (think: events).

Silverlight supports PInvoke and therefore also unsafe code. Unsafe code requires manually adding the “AllowUnsafeBlocks” tag to the Silverlight project file. Of course the use of PInvoke requires elevated trust, both in-browser and out-of-browser. The dll must be a file on the client computer. If you want to bring along your own dll with your Silverlight application, you will have to write your library to file somewhere, and then load it into memory for invocation. NESL provides an excellent example of this technique.

The hard part of PInvoke is Marshalling (found that out already). You also have to remember that the file location of the dll you want to invoke needs to be in the shell path, or explicitly stated in the dllimport attribute. In the context of Silverlight applications, the ‘current directory’ is not such a fantastic location to search for a dll.

What could you do with PInvoke

The driver for using PInvoke is that you can use resources already present on the client. If you bring your own dll, it can make use of other resources already present on the client. For instance, you could bring your own DirectX application, and have it use the DirectX runtime code present on the client. You can also bring along a dll that explicitly uses the spectacular parallel computing power of the GPU.

For me the reason is that PInvoke provides access to the DirectX and Media resources that a standard installation of Windows 7 brings along. I want to just write an application that may use anything the Windows SDK has to offer related to DirectX, other graphics, and audio & video and combine it with the goodies of Silverlight – notably its UI facilities, its software distribution facilities and its in-browser capabilities. Going directly to the Windows SDK keeps me independent of intermediate frameworks like XNA, SlimDX or SharpDX, so I can keep my software up-to-date myself, as opposed to e.g. XNA. It also seem to me that going this direction anticipates the release of Windows 8, the increasing emphasis on performance and smaller footprint that initiated the renaissance of C++(11), concurrent and asynchronous programming, and the openness of more platforms (form factors) to C++ development.

Of course, PInvoke requires the invoked dll to be present on the client. This may seem a drawback, but scenarios that motivate the use of dll-s for PInvoke (running software on the GPU, mainly) usually require (in practice) the Silverlight application to be installed as an OOB application with elevated trust anyhow. Saving a dll to disk will not make the difference.

Pro’s and Con’s of PInvoke

So, what are pro’s and con’s of PInvoke? Advantages of PInvoke are that it is supported by Silverlight – as opposed to C++ managed extensions mixed with native code, that it allows the use of C++ dll-s, and that these dll-s can be packaged and distributed along with a Silverlight application. Compared to the use of COM componentsthe advantages are the smaller overhead, and the fact that no formal installation is required, because no insertions in the registry are required.

Drawbacks of PInvoke are: well – it’s not as easy as a managed C++ dll that has native code mixed in, there is the marshalling overhead, implying restrictions on possibilities and performance, and PInvoke is not always that easy to use: there are some hard to find gotcha’s. And then there is this question: if I invest time to learn about PInvoke, what will this knowledge be worth when Windows 8 comes? Is PInvoke something of the PC, or will it be supported on other platforms as well?

Debugging PInvoke DLL-s from Managed Code

Many, many questions, and great despair can be found in the community forums concerning stepping through the native code – called from managed code- in debugging PInvoke scenarios.

Indeed, there seems to be no way to debug a PInvoke dll from Silverlight in Visual Studio 2010. The nearest thing is to create a Windows Presentation Foundation (WPF) client and debug it from there (bring code from your Silverlight application). Then, stepping through the C++ code from the .Net client is easy.

In the Properties of the project:

  1. Enable unmanaged code debugging.
  2. If required, rebuild your code, both client and dll.

Set a breakpoint in the native code, and see that process execution stops right there.

How to Work with C++ Managed Extensions from Silverlight

If you would want to add a C++ project to your Silverlight Solution, could that be done? Yes, it can. This article about using C++ with WPF opens the door. However, advantages that hold for Windows Presentation Foundation (WPF) do not hold for Silverlight. The conclusion of this article here will be that there is little to no gains to be expected. This article reports on finished research, and is actually a step-up to its successor about Pinvoke. But do read on to see what one can do and what one cannot do with C++ in the context of Silverlight.

A Direct and Simple Path from Silverlight to Native Code

Why on earth would you want to use C++ with Silverlight? Well, actually, for various reasons. The driver behind the research is that I sometimes need top performance code, and also would like to use software resources that are already present on a client computer.

What I would like to do is to add a native code dll to my Silverlight App. The Silverlight App will probably run out-of-browser on the client with elevated trust. The merit of Silverlight in this scenario is its software distribution and update facilities, and the fact that is delivers premium user interfaces, easy multi media and connectedness – all in an effective, that is, a well-organized and relatively compact framework. The native code dll will be downloaded along with the Silverlight App as a resource. After loading it into memory, we use its functionality.

C++ is known for its performance, small footprint programs and, recently, its practical parallelism. Managed extension of C++ allow you to interact with .Net from C++. It is also possible to build assemblies that contain both native and managed parts. So, the hope is that there can be a direct and simple line from a Silverlight application to C++ native code. Developing software, as opposed to using Pinvoke and COM black boxes, is a lot more transparent, more direct, and hence simpler. It probably also results in faster software since Marshalling is not such a big issue if the conversion or memory management problem is right there before your eyes.

The above scenario will be reality in Windows 8 (if that will be its name), where the WinRT layer will take the role of the CLR (in this scenario). But for Windows 7 it is not. Indeed, you can write a managed C++ class that if compiled with the /clr:safe compiler option, can be loaded and executed from a Silverlight class. However, the /clr:safe option precludes the use of unverifiable code. See the MSDN library articles on Pure and Verifiable code. There seems to be a loophole in the seclusion of the ‘verifiability’ of the C++ class, but a loophole is not a sound basis for software engineering practices (or maintainable software).

SlimDX and SharpDX

Among others, SlimDX uses the above described path to connect the DirectX11 and .Net worlds. This works in the context of general .Net software. SlimDX is therefore not an easy available alternative for XNA in Silverlight. One might be on the look-out for an alternative since the XNA subset in Silverlight 5 is restricted, and XNA is based on DirectX9, which is increasingly seen as becoming outdated by now. See e.g. this blog post by Aaron.

Pinvoke

The MSDN library states at multiple points that PInvoke is the alternative in case you want to interact with unverifiable code.

Silverlight 5 – Moon boundary transition effects

Playing around with the Hollow Moon Video Show, it came to me that the transition from outer space into the moon, vice versa, needs transitional effects.

I also noted that it is hard to stop at a exactly the position one desires around the video screen. This calls for a throttle!

Transitional effect 1: Entering the moon

It seems nice that in approaching the moon the hull seems to open up and show the interior world – as an invitation to come and explore. Next question is how to implement such a feature. The choice for a shader effect seems preferable over a vertex based effect here. A vertex based effect means that an animation will move parts of the sphere (the moon) around to open up. But, the same vertices are used to project the inner world, which would then be invisible where the moon surface was has been removed. So, a shader effect it will be.

In order to complicate matters not too much, the expansion shader used earlier was reused. The effect however presents itself entirely different in this new settings; expansion is now an inverse function of the distance to the surface, and it works on a sphere, not a flat surface. This provides for a quite nice effect.

You can’t immediately see the video screen now, I’ve increased the size of the moon significantly in order to improve the illusion one is travelling through an enormous and desolate landscape. See the section on throttling for more.

Transitional effect 2: Leaving the moon

The shader effect above was relatively simple to implement. However, now the challenge is to create a shader effect within an environment mapping effect where shader sampling is in 3D space. Behold, it is not the math, it is the shader engine (level 2) that responds to any creative idea with the message that the shader is too complex to process. A disappointment. So, for now I’ve settled for a simple black spot (hole in the moon, if you like) that shows the stars in the background (to be implemented J ).

The idea is simple: a small black spot is projected onto the moon interior surface where we will leave the moon. We approach, and the spot grows bigger, then we pass through. We create the hole by just clipping the shader texels at the desired location. But how does one find the right position for the black hole?

The answer to that question was not easy, and it is not quite satisfactory in its final form. The Silverlight XNA library contains an Intersect method for both the BoundingSphere and the Ray classes. The idea is simple: if you have a position and a direction – and a chase camera usually has, you can define a ray, and the Intersect method provides you with the distance to impact, if any. However, this method does not work for rays that originate within the BoundingSphere. OK, no problem, I’ll just project myself out of the Bounding sphere by a known distance, turn around, and then obtain the distance to impact. This gives you a value, BUT, the Intersection method provides you with a distance to the center of the BoundingSphere, not to its hull, and not in the provided direction.

So. As an alternative I found a handy article at StackOverflow containing a decent treatment of how to mathematically solve the intersections of a sphere and a line (ray). A static method implementing the theory takes 0.01 second to computer the distance to either zero, one or two intersection points.

This solution works fine most of the times, but if you navigate through e.g. the top of the moon, the black spot gets distorted into an asymmetrical form that resembles an ellipse, and it gets displaced. It seems to me that the distortion indicates the limits of the rendering system, rather than an error in the algorithm that positions the black spot. The image below depicts the black hole in effective mode.

OK, I do feel an obligation to improve on this. But it will have to do for now. As soon as I thought out an dramatic effect that the shader engine can render, I will implement it. I promise!

Throttling and the parallax-ish illusion

The idea of environment mapping is that the camera is always unboundedly far from the camera, so that a parallax effect is created: the background doesn’t move with the camera (or observer). One technique to implement this is to move the background with the camera (same translation), or alternatively to stitch the background to the far plane.

Although this is theoretically convincing, and sometime right in practice, I find it unsatisfactory. The background seems dead, not just far away. I’ve been in open ground a lot, and when you travel around, you will notice that your view of the landscape changes, especially if you watch the seem scenery for a prolonged time. It changes slowly, though.

In the current situation, that of the Hollow Moon, there is also little else for visual orientation than movement of the landscape. So we need, to move the landscape a little in order to generate the illusion of travelling through is. If not, encountering the video screen, or the boundaries of the moon itself, come a complete surprise.

Now, if we would move slowly relatively to the moon, and also give the impression that the moon is huge, it would take forever (well, weeks) to get from the starting point to the center of the moon. So, we need a throttle. The throttle can be used to move towards and into the moon quickly, and to travel inside the moon increasingly slowly. A throttle has been implemented and is controlled by the S (slower) and F (faster) keys. I’ve also double the maximum speed and increased the size of the moon relatively to the video screen. It is now about 1250 times the size of the screen. How to operate the throttle is also indicated on the start screen message.

Demo Application

A demo application of phase 5 of this project can be found here, scroll down to “Moon boundary transition effects” (no, the # tags still don’t work).

Wish list

It turns out that the further the development of this moon thing progresses, the more wishes arise that are not (yet) implemented. That in itself is curious, but well. This section is to be a recurring section of those wishes, if only as a reminder of imperfection, and a source for philosophical contemplations. So far we have the following wishes.

Dramatic exit effect when leaving the moon

As discussed above, but feasible for the shader compiler level 2, while in the context of environment maps.

Elaborate sound effects that include panning

As noted, it is not easy to implement 3D effects on the sound sources, split by stereo channel. WE cannot apply panning to the individual sound channels of a video. If we could, the user would experience the oral effect of the sound pillars rotating around. Also a Doppler effect would be nice.

Textures that indicate speakers at the sound pillars

The sound pillars that flank the video screen are evenly colored (gold). They could do with some grid like textures that indicate the presence of speakers at those positions. We wouldn’t go as far as to implement moving speakers (woofers), would we?

Higher resolution graphics and MipMapping

If the camera approaches the moon surface or the interior surface, the low resolution of the images used begins to show. So, we would like to be able to use higher resolution. We also should implement mipmap levels (when you get closer to the surface, a higher resolution image is presented), I know. Mipmapping has the drawback that is greatly increases the amount of data that has to be sent over the internet. There has to be stuck a balance here.

Silverlight 5 – Poor man’s sound effects

One of the beauties of Silverlight is that is has or is a web based software delivery mechanism. A user clicks a link (icon, image, and video) on a web page and is offered an application that in many instances can be executed within the confines of a web browser as well. Once installed the application can update itself when new version become available. Recently Silverlight has been extended to also use pretty arbitrary native software components using the PInvoke mechanism. This last extension is a winner, and we will see in this blog that it is because it totally opens the Windows platform for use by Downloaded Silverlight Apps.

In Phase three of the Hollow Moon we have seen that 3D-Graphics can be Combined with playing a video within the virtual world created with 3d-graphics. We see a video screen, rotating within the Hollow Moon. A chase camera allows us to pass through the moon, and the screen (below, over, left, right – anything). Of course, what we would like now is sound effects that place the origin of the video soundtrack at the sound columns. And we want more.

Volume and frequency effects

In approaching, the sound intensity should increase, in a natural way. A nice touch would be that the volume increases stepwise when we pass through the moon wall. Nicer even, would be if we could filter out the high frequencies when outside the moon, leaving a kind of muffled version of the sound track that clears up when entering the moon. We would also like a velocity dependent Doppler effect when passing the video screen, possibly at high speed.

Panning effects

When approaching the video screen, the sound should seem to be located at the sound columns as, mentioned earlier. Since the video screen rotates, we also would like the sound to pan in such a way that the sound seems to originate at the rotating sound columns. This panning effect should also take into account the position of the camera, especially if it is behind the screen, or below or over it. It should take into account the movements of the camera; i.e. if we move along with one of the sound columns, the pan effect should not be noticeable anymore.

Silverlight and sound effects for video soundtracks

So, now that we have specified what we want, can Silverlight provide us with the means to build this? Eh, no.

Silverlight has some means to manipulate sounds, but these do not apply to video sound tracks. If you want to use these facilities, you first have to extract the sound track from the video. That’s not what we want. We want the user to select the video to be shown, and then play it. We might even want the user to be able to play arbitrary streaming video. Easy and elegantly.

At first that is some kind of a disappointment. Why don’t they (Microsoft) just provide what I need???

But if you think about it: the intelligent solution is not to port all the Microsoft software to Silverlight – that would turn Silverlight into a monstrum – but to make all software available to Silverlight. And that is about (not all software is available) what has been done by the introduction of COM Interop (earlier) and PInvoke (version 5) mechanisms.

The possibilities available in Silverlight to manipulate a video soundtrack are the volume and the balance. Balance is not equal to Pan, although the difference is a bit subtle. The balance is the distribution of the stereo channel volume over the speakers. Pan is the distribution of the soundtrack channel volumes over the output stereo channels. So, what we can have is an increase in volume when approaching the video screen, including a stepwise increase when coming through the Moon perimeter, and some play with the balance.

Poor man’s sound effects

To see how far this could be pushed I devised some poor man’s sound effects.

Sound intensity I (volume) decreases as a function of distance d like:

I(d) is proportional to 1/ (1 + d^2)

Which is used to modify an initial intensity, resulting in:

I(d) = I(0) / (1 + d^2)

By using a high power (7, in this case), you get steep changes in volume close by the video screen. This provides at least some reference to a Doppler effect. Thus we get:

I(d) = I(0) / (1 + d^7), with I(0) = 1, and d typically in [0, 3000].

For intensities outside the confines of the moon, we subtract 10%:

I(d)outside = 0.9 * I(0) / (1 + d^7)

Values below 0.1 are clipped. The lower bound provides a faint trace of the sound track that is supposed to lure the user towards the video screen.

You can also swing the balance a bit to emulate panning the sound to match the positions of the sound pillars. In this case the balance swings between ± 0.5. By keeping the swing limited I hope to fool the listener in hearing a faint panning effect :-).

Alternatives

To be honest, the result is not very satisfying, especially with regards to the emulation of panning, and I am not going to accept this ‘unpremium’ sound effect situation. Well, I will for now, but I will drastically change my technological scope, see below.

As indicated above, the situation initiates a need to take the route via either COM or PInvoke to available technologies that do provide enough control over the sound track of the video. What are our options?

XNA Game Studio

We could create COM wrappers for XNA dll-s. And hope to access the relevant XNA functionality this way. But Hey! XNA cannot apply its sound effects to video sound tracks either. This will get us nowhere.

Silverlight MediaStreamSource

We could implement Silverlight’s abstract MediaStreamSource class. That will be a solution for .wmv file video’s (ASF format). The MediaStreamSource class allows for separate access to the video and the sound streams in a file. This however, feels like rewriting already existing software. Windows, DirectX, etc. already contain various software facilities to quickly access media files containing both sound and video, so we like to use those existing facilities.

Examples of COM and PInvoke

SharpDX and SlimDX

There exist Managed wrappers for DirectX technologies. In particular SlimDX and SharpDX. There may be others, of course, but these I found.

SlimDX is an open source .Net library that wraps DirectX. It makes intelligent use of C++ by loading an activating the native DirectX COM components, and wrapping it by .Net C++ code. The SlimDX library itself is a .Net assembly (that cannot be referenced by Silverlight directly). When I first heard of SlimDX, I thought it might be rebuilt against the Silverlight runtime, thereby solving the problem we’re facing definitely. However, since it is written in .Net C++, rebuilding it as a Silverlight application is a very extensive job. Nevertheless, When rebuilt as a COM server, we may be able to use it from Silverlight after all. It would bring the advantage that marshalling to / from the CLR already has been taken care of.

SharpDX is a direct competitor to SlimDx, but the source code is C#, and the Library is to a large extent generated from the DirectX api’s (wow!). It is also faster than SlimDX. A major advantage is also that it built cleanly on my PC, and SlimDX does not – it wants me to install VS2008 first. The advantage of SharpDX over SlimDX is that it seems possible to port it to Silverlight

Both SlimDX and SharpDX do not provide access to libraries that process video files. Too bad. Both are valuable sources of knowledge on how to access native software from Managed code.

NESL

NESL stands for Native Extensions of Silverlight. A open source collection of COM-servers that wrap Windows 7 functionality. Interesting about NESL is not only what it is, but that it also has an elegant mechanism to install required native software on the user’s machine (requires Administrator rights, though). Of course, Silverlight 5 introduces PInvoke, thereby providing direct access to the Windows system. Nevertheless, NESL provide good knowledge on the aforementioned install mechanism.

Windows 8

In Windows 8, The use of Xaml with C++ is a standard option. This makes DirectX (etc.) directly available for use in Xaml based applications; Only issue is that rendered 3D-graphics are to be re-rendered on a Xaml control like a BitmapImage, using a WriteableBitmap and a blit operation.

So, Conclusion

There is much to learn from NESL, SharpDX and SlimDX. SharpDX may be portable to Silverlight, providing a much better alternative than the current partial XNA port. In principle what is required is to provide native DirectX technology as COM servers in Silverlight apps. This can also be done on a per application basis; build a DirectX application, Wrap it in COM, use it in Silverlight, Require the user to have DirectX 11 and or Windows 7(+).

But this is not all. We also see the advent of Google’s NaCl (Native Client) which allows HTML5 applications to use C/C++ code in a sandbox. Microsoft will presumably follow suit in order to provide comparable performance, and sustain the market dominance of IE. But wait! It used to be possible to reference COM components from HTML pages. Does this still work in HTML5?

In this blog post , a lot of options have been discussed, and a policy has been set out: to create COM-Components, or PInvoke dll-s that can be executed by Silverlight applications to use the full power of the DirectX and Windows Media libraries, that can also be elegantly installed within the context of the Silverlight application.

I expect and hope for seamless integration of a DirectX surface in Xaml and the possibility to execute native code from an HTML5 application in order to draw the results on the HTML5 canvas, both as parts of Windows 8.

Sample Application

A Sample application exhibiting the poor man’s sound effects can be found here. Scroll down to ‘The Moon Poor Man’s Sound Effects’.

So, now that we can navigate into and out of the moon, would it not also be nice if we could watch a video while being inside? Yes, it would! At least, it would seem nice to me, if I were a moon traveler.

But wait; let’s not pretend the previous episode in this series was written last week. Indeed, it has been quite a while since the second episode in this series about a hollow moon in 3D (the reason simply being having to make some money). During this silence, Microsoft has released version 5 of Silverlight. Version 5 has seen some late changes that are of consequence to this Moon project. Hence, extra effort and time were required to revise episodes 1 and 2 of the series, and to develop episode 3.

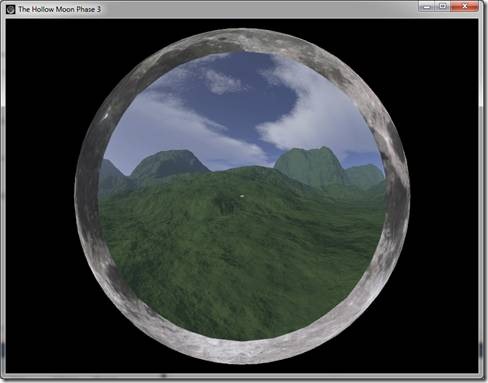
Apart from developing a video display facility for the moon, I’ve also improved the resolution of the moon model. So, when looking through a hole in the moon, such a hole is now a better approximation of a circle than in episode 2. Note the small rectangle in the middle. That’s the video screen. I’ve also reinserted the initial text overlay that explains the use of the keyboard.

clip_image002

Now, how do you play a video within a 3D model in Silverlight 5.

The Model

First we need a model. I’ve created a model in Autodesk Softimage Modding Tool 7 (the free version; free as in ‘free to create noncommercial models’). The model consists of a screen flanked by two cylinders that depict sound columns. If we get to it, some textures will be added to make the cylinders really look like HiFi loudspeaker boxes. A black circular wire frame for instance. The screen measures 16 x 9 units.

image

The hard part is not to forget to add texture support to the model, then it can be exported as an .fbx file.

Importing the model into the Moon is done using the new Content pipeline from the Silverlight 5 3D toolkit (see David Catuhe’s blog on this toolkit). Importing the model and initializing standard lighting is all standard coding. Texturing the screen with video images is not.

Texturing the model

The model has three meshes: the cylinders and a surface. We texture the cylinders gold, using the standard basic Effect. But how do we get the video images on the screen? With beta versions of Silverlight 5 we could get it done with code like this for the Draw event handler of the DrawingSurface.Draw event.

private void OnDraw(object sender, DrawEventArgs e)
{
    // Dispatch work on the UI thread, to prevent illegal cross thread access
    drawingSurface1.Dispatcher.BeginInvoke(delegate()
    {
        // Create a snapshot from the video frame
        WriteableBitmap wbm = new WriteableBitmap(mediaElement1, null);

       // Copy it to the texture
       writeableBitmap.CopyTo(videoScreenTexture);
    });

    // This BasicEffect is already attached to the graphics device
    basicEffect1.Texture = videoScreenTexture;

    // draw 3D scene
    VideoScreen.Draw(GraphicsDeviceManager.Current.GraphicsDevice, e.TotalTime);

    // invalidate to get a callback next frame
    e.InvalidateSurface();
}

But the Silverlight RTM version seems to be allergic to the WriteableBitmap, and we have to go down to the color array. The following code is a fragment of code that iterates through the meshes an meshparts of a model and draws it. It shows how to handle the video surface

if (modelMesh.Name == "grid")
{
    basicEffect.Texture = videoFrameTexture;

    // Set the Color array, on the UI thread
    Scene.Surface.Dispatcher.BeginInvoke(SetColorArray);

    basicEffect.Texture.SetData<Color>(videoFrameColors);
}
else
    basicEffect.Texture = goldTexture;

The ‘setColorArray’ method called by BeginInvoke is code from the source of the WriteableBitmapEx used for transforming pixels into Color structs:

private void SetColorArray()
{
    WriteableBitmap bmp = new WriteableBitmap(videoInput, null);

    int len = bmp.Pixels.Length;

    for (int i = 0; i < len; i++)
    {
        var c = bmp.Pixels[i];
        var a = (byte)(c >> 24);

        // Prevent division by zero
        int ai = a;
        if (ai == 0) ai = 1;

        // Scale inverse alpha to use cheap integer mul bit shift
        ai = ((255 << 8) / ai);

        videoFrameColors[i] = new Color((byte)((((c >> 16) & 0xFF) * ai) >> 8),
                                        (byte)((((c >> 8) & 0xFF) * ai) >> 8),
                                        (byte)((((c & 0xFF) * ai) >> 8)));
    }
}

Where ‘videoFrameColors’ is a global variable of type Color[].

The result looks like the image below. The multisampling rate has been set to “4” in order to mend the staircase effect on skewed lines.

clip_image002[7]

You can find a demo application here (scroll down to Phase 3). The video shown is a looping fragment from the great animation “Big Bug Bunny” .

Silverlight 5 – The moon interior world

While looking at the moon as presented in the sample application, I thought: “wouldn’t it be fun to be able to get into it and then find a friendly landscape to explore”. What we need for this is a so called Sky Sphere, and a moving camera.

Sky Sphere

A Sky Sphere consists of a cube which faces are textured with a coherent set of 6 images. For instance, the 6 connected images resulting from taking a photograph into each of the 6 orthogonal directions, starting at the horizontal direction facing north. Within this cube is a sphere, and the inside of this sphere is textured with the cube textures by means of extrapolation of positions on the sphere onto positions on the cube. Then, within the cube you see the seamless projection of the cube’s images. This technique is used to provide an environment; it is also called environment mapping. The idea is to move the sphere and cube with the camera so the sky sphere always presents a distant environment. In the current version we have not yet set the step to always keeping the environment distant. At this point we want to be able to travel through the moon, to, into, through, out and away from it. The XNA Sky Sphere Community Sample served as a starting point for development.

Camera

A camera is in fact a component that provides you with a View matrix. There are a number of cameras available through XNA community samples. I explored:

  1. The ArcBall camera
  2. The Orbit camera
  3. The Chase camera

The ArcBall camera

The advantage of the ArcBall camera is that it has a large number of properties and many degrees of freedom. It therefore has a broad spectrum of applicability. On the other hand, the code is complex, and in any particular application it holds a lot of code you don’t need. Also it is hard to keep it leveled straight. Somehow I always managed to get the view somewhat tilted, but never managed to get out of the tilt. So I looked a bit further.

The Orbit camera

The Particles XNA community sample contains code for a typical orbit camera. An orbit camera can move around its LookAt, even zoom into it. This camera lacks the capability to move around freely, that is, to change, or control, the LookAt. So, we will need not one, but two camera’s, one of which will be this orbit camera.

The Chase camera

The Chase Camera is another XNA community sample. In the sample the target is a ship. In our project we do not have a visible target. The target is just the LookAt. Typically, the target, or LookAt, is what you control with the keyboard or game controller, the camera just follows the target. The target can also be controlled using the mouse. Instructions for controlling the chase camera can be found in the section “Sample Application” below.

What you control defines the major difference between a chase camera and an orbit camera. In the former case you control the target, and in the latter the camera (while the target remains stationary). One could easily create an integrated camera that switches between orbiting and chasing. For now, I’ve adapted the chase camera to fit the needs of this application, as described above.

Creating the Silverlight 5 version of phase 2

To port software from XNA to Silverlight 5 does (still) require real work. The first task is to split up the Effect file into separate shaders. One file for each vertex shader and one file for each pixel shader. Since we have an inside and an outside to draw, we end up four shader files that have to be loaded separately. The same holds for the .dds file that holds the image set for the environment map. The set had to be split into 6 separate file that have to be loaded individually.

At first I couldn’t find a way to load the Silverlight 5 textureCube into the shaders. But at some time I found that the TextureCube is a subclass of the Texture class, hence can be assigned to the textures collection of the GraphicsDevice which will then load it into the shaders at runtime.

The UI thread and the Composition thread of the DrawingSurface

We want to control the pitch (vertical angle), yaw (horizontal angle) and thrust by means of keyboard (and mouse, but see below). So, mouse and keyboard events set a variable that indicates that a change in angle is required. The mouse and keyboard events happen on the UI thread. The Draw event happens on the Composition thread. In order to prevent synchronization problems, we want to prevent (re)setting the yaw and pith variables on this thread.

In order to prevent both synchronization problems and loss of performance as a consequence of using locks or wait states, we set e.g. the pitch variable in the KeyDown event handler (for the Up and Down keys), and reset it in the KeyUp event handler. The Draw event handler only reads (samples) this variable.

In the RC (release candidate) version of Silverlight 5, the DrawingSurface and e.g. the Rectangle do not raise keyboard events. The Textbox, however, does. On the other hand, the DrawingSurface and the Rectangle do raise mouse events, but the Textbox doesn’t. Also, these events do not seem to be routed events, that ‘bubble up’, yet. So we have to choose between mouse input and keyboard input over the DrawingSurface. For this application I have chosen keyboard input. We use a transparent Textbox, stretched out over the DrawingSurface to raise keyboard events.

Keyboard control has its problems:

  • Before the TextBox has the focus, we first have to click it. We use a startup message that has to be clicked away as a work around.
  • It might well be that the left and right arrow keys respond only after a while. This does not hold for the up and down arrow keys, or the space bar. Reason unknown.

Remark on the render system: at the edges of the drawing surface, the shape of the moon gets distorted – flatted out to an ellipsis. This turned out also to be the case for the XNA version; something to look into.

Sample application

A sample application can be found here, as the Phase 2 app. The keys for navigation are:

  • Space: forward
  • Left (Right, Up, Down) arrow: rotate to the left (right, up, down)
  • T key: turns the camera around (180 degrees)
  • R key: resets
  • A key: toggles physics

The sample application demos the moon interior and the chase camera. And that’s it.

Edit 29-12-2011: Since the Release of Silverlight 5 RTM some changes were made to the sample program. There is no startup message any more. On the other hand, the application only runs after local installation.

Silverlight 5 – Rotating Moon in 3D

Providing 3D user experiences over the web is an extraordinary technological feat. It is possible when we use the XNA integration with Silverlight 5 (beta). This blog post describes a first experiment: showing a rotating moon. In upcoming posts I hope to extend this experiment to include some further nice features.

Approach

The approach taken here is to first develop a model in XNA, for PC, and to then port it to Silverlight 5 when finished. This provides access to well known and well developed coding idiom, and the means to test and debug the code. It also provides the opportunity to separate off any problems that are specific to the integration of XNA and Silverlight.

Starting Point

The starting point was the “Textures and Colors” sample from the Microsoft App Hub site. This sample provides the essential techniques for importing a sphere and texturing it with an image. The sample provides much more, but we don’t need that right now.

The mapping of an image, which is usually rectangular or square, onto a sphere is not straightforward. See the screenshot from the “Textures and Colors” Sample below (left) which maps a “Cloud” texture onto a sphere, and an experiment in which a quilt design was mapped onto the sphere.

There are two obvious ways around this problem. One is to have an image that has been prepared to compensate for this effect. The other way is to map the image to the sphere while compensating for its shape.

When we apply a technique called Spherical Mapping, we get somewhat improved results, but still not satisfying. Spherical Mapping uses Normal vectors to correct the u and v coordinates that are used to sample a texture for a given xyz 3D coordinate. Coordinates are calculated as:

u = asin(Nx)/PI + 0.5

v = asin(Ny)/PI + 0.5

where NX is the x-component of a Normal vector. Results in our cases are as follows.

The blue and white quilt ball looks much better, the cloud texture map still looks awful. Luckily, I was able to find a cylindrical projection map of the moon on the internet which looks quite good.

At first, I thought that the terrain was looking odd because of deformations caused by mapping the image onto the sphere, but this is the actual south pole of the moon. And, by the way, this is a much better image than the one you get from Google Moon (Earth).

Creating the Silverlight 5 application

The idea is to use the new DrawingSurface control to render the 3D scene. Needed here is a way to import the sphere model into a Silverlight 5 Application, and to use vertex and pixel shaders to position and texture it with the image.

Some people have already created practices and extensions that can be used to get this done. Entry point to these pioneers is Aaron Oneal’s Blog. Notable contributions that have been made are the CodePlex Babylon Toolkit project by (predominantly) David Catuhe, and The model loading CodePlex project by Simon Ferquel. We will use aspects of those contributions where required.

I’m somewhat reluctant to jump at CodePlex products, since experience taught me that frequently there are some disadvantages attached. For instance, a feature I really would like to use is the ShaderBuildTask. This automatically builds the shaders when you build your project. However, for the ShaderBuildTask the shaders should be attributed as ‘content’, not as ‘resource’. If not, you’ll get a build error stating that the output already exists. The disadvantage is that you cannot use the resource addressing idiom (the “;component/” format). Then the shaders cannot be loaded since the code that loads the shaders is in another Visual Studio Project than the shaders. So, back to the scripts from the first Microsoft Silverlight 5 3D demo application. See what I mean?

Anyway. The model Importer by Simon Ferquel did prove its use.

Sample App

A Silverlight 5 sample application showing the moon in slow rotation can be run at my App Shop. This is a separate corner of the App Shop: an HTML 5 site, presenting Silverlight 5 Apps.

Glassy Buttons on a Magnifier

Glassy buttons, or other controls, have a great appeal because of their transparent and shiny character. They remind us of gems. In user interfaces, the transparent character is also of great use in case you need to see what is beneath the control.

Recently, I dug up the Silverlight Glass Button tutorial by Martin Grayson. This glass button consists not only of a very fine looking exterior, but also has sophisticated animated behavior. An overview of the steps to create such a button is as follows below.

Creating the Glassy Button

  1. Create project in Blend
  2. Set the root background to a gradient color that blends well with the color of the glass button.
  3. Create a button and start editing the template (empty template option)
  4. Add a Border control to the template: the button’s Outer Border
    1. Add a second border, within the outer border: the Inner Border. Set the backgroundColor to Black, and the Alpha to 0.5.
    2. Add Grid to Inner Border with a row divider to middle of the grid
    3. Add border to top row: the Shine. Remove the margins, set the V / H alignment to stretch, and set the background to linear gradient from top to bottom. Set the Black gradient stop to Alpha = 60%, color=white. Set Other gradient stop to Alpha = 20%.
  5. Add ContentPresenter to the center of the Button. Set it between Shine and Glow (see below). Set Foreground color to white (or other color that stands out).

This is the standard look of the button. Now add a blue Vista glow for the MouseOver event.

  1. Add another border, called Glow to the Grid, RowSpan = 2. Width=Auto, H/V align = stretch. The Background is a RadialGradientBrush. Set the left gradient stop to a light blue (141, 189, 255) with alpha: 70%, and the right stop to the same color with alpha = 0. Expand the gradient beyond the bounds of the button to look like the rising sun in the top row. Set the glow behind the Shine. Set opacity of the control to 0, animation that will show it will be added later
  2. Animate the MouseOver state transition by moving the Glow opacity in 0.33 s to 1.0, including revert.
  3. Animate the button Press state transition by hiding the Glow (Visibility:Hidden), setting the Opacity of the Shine to 40%, and settting the Background Border opacity from 80% to 50%.

That’s it. Of Course, the color of the button is arbitrary, as is the color of the Shine and Glow. This idea could be extended by providing an extra bottom layer onto which you could project items. Possible items are an image, a video, a Dropshadow of the text in the button’s Content control, etc. Another extension might be to apply the inner shadow by Samual Jack.

The Magnifier control

The glassy button has been used in a magnifier control. A magnifier can be used to enlarge pieces of the client window in order to study it with more precision. This specific magnifier has five buttons: enlarge what is under the magnifying glass, reduce it, reset it to normal, and then: flip the image horizontally or vertically (toggles). This last functionality may come in handy if you want to study rotated / mirrored images.

Note that this is the second time that we encounter the need for a jog / shuttle control: to be able to rotate the magnified image to arbitrary angle, apart from mirroring, would be an improvement. In this specific application we would use the jog / shuttle control as a rim around the magnifying glass.

Okay, back to the Glassy Buttons. They fit nicely in this design since you can look through them when positioning the magnifier. The outer border of the magnifying glass has been transparently colored using a rainbow like gradient so you can find it back, also in a multicolored image like the one in the example App.

In order to position the magnifier, you can drag it around by the rim. The functionality was added using the Expression Blend MouseDragElementBehavior. Although this behavior doesn’t work for Buttons, it works for controls that contain Buttons.

The magnifier uses two WriteableBitmaps. One to hold an image of the LayoutRoot, and one to hold the image of the magnifier. Copying is done using the Clear and the Blit function in the WriteableBitmap Extensions. Of course, before copying the visible rectangle has to be determined, for situations in which the magnifier is only partly visible (off screen / covered).

A specific problem solved was how to initially get the bitmap of the LayoutRoot. If the image is loaded from the hosting web site, and is not present in the xap itself, the LayoutRoot bitmap remains empty, until created after the first rendering. For all clarity, the creation of the LayoutRoot bitmap is located in the SizeChanged event handler. So, we have the initial LayoutRoot bitmap created the first time the magnifier bitmap is created – code guarded by a Boolean flag :-(.

The magnification itself, as well as the horizontal and vertical flips is done by means of a simple pixel shader.