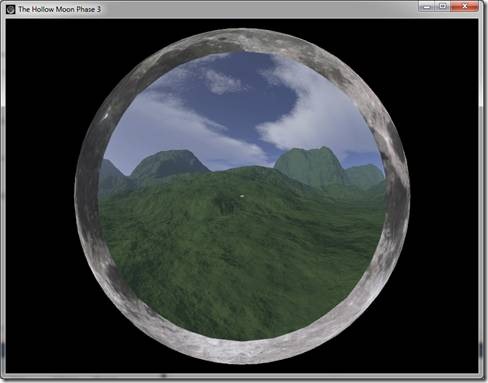
So, now that we can navigate into and out of the moon, would it not also be nice if we could watch a video while being inside? Yes, it would! At least, it would seem nice to me, if I were a moon traveler.
But wait; let’s not pretend the previous episode in this series was written last week. Indeed, it has been quite a while since the second episode in this series about a hollow moon in 3D (the reason simply being having to make some money). During this silence, Microsoft has released version 5 of Silverlight. Version 5 has seen some late changes that are of consequence to this Moon project. Hence, extra effort and time were required to revise episodes 1 and 2 of the series, and to develop episode 3.
Apart from developing a video display facility for the moon, I’ve also improved the resolution of the moon model. So, when looking through a hole in the moon, such a hole is now a better approximation of a circle than in episode 2. Note the small rectangle in the middle. That’s the video screen. I’ve also reinserted the initial text overlay that explains the use of the keyboard.
Now, how do you play a video within a 3D model in Silverlight 5.
The Model
First we need a model. I’ve created a model in Autodesk Softimage Modding Tool 7 (the free version; free as in ‘free to create noncommercial models’). The model consists of a screen flanked by two cylinders that depict sound columns. If we get to it, some textures will be added to make the cylinders really look like HiFi loudspeaker boxes. A black circular wire frame for instance. The screen measures 16 x 9 units.
The hard part is not to forget to add texture support to the model, then it can be exported as an .fbx file.
Importing the model into the Moon is done using the new Content pipeline from the Silverlight 5 3D toolkit (see David Catuhe’s blog on this toolkit). Importing the model and initializing standard lighting is all standard coding. Texturing the screen with video images is not.
Texturing the model
The model has three meshes: the cylinders and a surface. We texture the cylinders gold, using the standard basic Effect. But how do we get the video images on the screen? With beta versions of Silverlight 5 we could get it done with code like this for the Draw event handler of the DrawingSurface.Draw event.
private void OnDraw(object sender, DrawEventArgs e)
{
    // Dispatch work on the UI thread, to prevent illegal cross thread access
    drawingSurface1.Dispatcher.BeginInvoke(delegate()
    {
        // Create a snapshot from the video frame
        WriteableBitmap wbm = new WriteableBitmap(mediaElement1, null);

       // Copy it to the texture
       writeableBitmap.CopyTo(videoScreenTexture);
    });

    // This BasicEffect is already attached to the graphics device
    basicEffect1.Texture = videoScreenTexture;

    // draw 3D scene
    VideoScreen.Draw(GraphicsDeviceManager.Current.GraphicsDevice, e.TotalTime);

    // invalidate to get a callback next frame
    e.InvalidateSurface();
}
But the Silverlight RTM version seems to be allergic to the WriteableBitmap, and we have to go down to the color array. The following code is a fragment of code that iterates through the meshes an meshparts of a model and draws it. It shows how to handle the video surface
if (modelMesh.Name == "grid")
{
    basicEffect.Texture = videoFrameTexture;

    // Set the Color array, on the UI thread
    Scene.Surface.Dispatcher.BeginInvoke(SetColorArray);

    basicEffect.Texture.SetData<Color>(videoFrameColors);
}
else
    basicEffect.Texture = goldTexture;
The ‘setColorArray’ method called by BeginInvoke is code from the source of the WriteableBitmapEx used for transforming pixels into Color structs:
private void SetColorArray()
{
    WriteableBitmap bmp = new WriteableBitmap(videoInput, null);

    int len = bmp.Pixels.Length;

    for (int i = 0; i < len; i++)
    {
        var c = bmp.Pixels[i];
        var a = (byte)(c >> 24);

        // Prevent division by zero
        int ai = a;
        if (ai == 0) ai = 1;

        // Scale inverse alpha to use cheap integer mul bit shift
        ai = ((255 << 8) / ai);

        videoFrameColors[i] = new Color((byte)((((c >> 16) & 0xFF) * ai) >> 8),
                                        (byte)((((c >> 8) & 0xFF) * ai) >> 8),
                                        (byte)((((c & 0xFF) * ai) >> 8)));
    }
}
Where ‘videoFrameColors’ is a global variable of type Color[].
The result looks like the image below. The multisampling rate has been set to “4” in order to mend the staircase effect on skewed lines.
You can find a demo application here (scroll down to Phase 3). The video shown is a looping fragment from the great animation “Big Bug Bunny” .


![clip_image002[7] clip_image002[7]](https://marcdrossaers.files.wordpress.com/2012/01/clip_image0027_thumb.jpg?w=543&h=426)